Instant Pot Acorn Squash
- Prep time: 5 minutes
- Cooking time: 10 minutes
- Quick Natural Pressure Release: 10 minutes
- Total time: Approx. 30 minutes
Ingredients
Acorn Squash and Water:
- 1 to 2 acorn squash; halved and seeded
- ½ cup water
Toppings:
- Butter
- Brown sugar
- Ground nutmeg
Ingredients
(serves 4)
Section
Instructions
-
The size of acorn squash and the size of the Instant Pot will determine how many halves can be cooked at one time. The cooking time is short, so they can be cooked in batches.
- Place squash on a large cutting board.
- Using a large, heavy duty knife, plunge point of knife into squash and then carefully bring the handle of the knife down from a 90° angle to a 45° or less.
- Once the knife has scored the entire length of the squash, press down firmly with both hands and allow the knife blade to cut the squash in half.
- Scoop the seeds and stringy material out with a soup spoon.
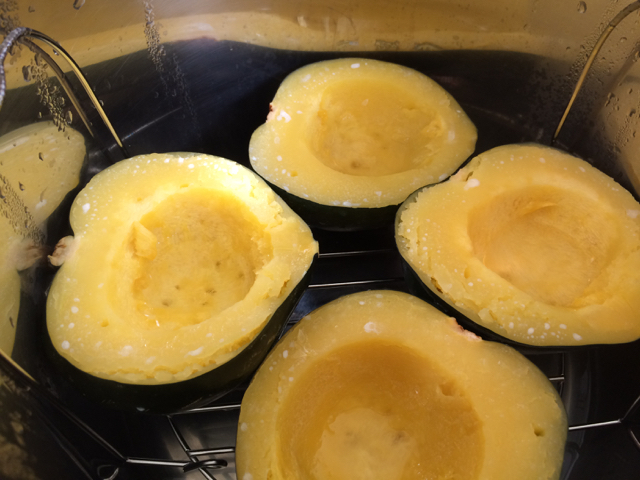
- Place the steaming rack in the Instant Pot.
- Add ½ cup of water to the Instant Pot.
- Place 1 to 4 acorn halves in a single layer on the rack.
- Close and lock lid.
- Check to make sure the steam release handle points to "Sealing".
- Press the "Manual" or "Pressure Cook" button and set the timer for 10 minutes.
- When the timer goes off the cooker will automatically go to the "Keep Warm/Cancel" mode.
- Carefully twist the steam release handle on the lid to "Venting" position. Keep hands and face away from hole on top of the steam release valve to avoid scalding.
- Once the steam has escaped and the red float valve has dropped down, carefully unlock the lid and remove the squash.
- Using a large spoon, scoop the squash carefully away from the rind. If the rind holds its shape you can serve the squash in the rind. If it breaks apart you can serve the squash in a serving bowl.
- Add a pat of butter, 1 teaspoon brown sugar, and a dash of nutmeg to each squash half.
- Serve.


Comments
Is your Instant Pot taking a long time to build up pressure? Is there a lot of steam leaking from the lid? Is there an unusual amount of water in the condensation collector? What can you do?Check Your Sealing Ring Periodically:
Step One: Check to make sure the sealing ring is installed correctly. If it is installed correctly then see next step.
Step Two: Replace sealing ring as it may be damaged or worn out.